
Axe Restoration: Restoring an Axe on a Budget
If you’re fortunate enough to find an old axe head laying around, don’t throw it out! Axe restoration is very simple and inexpensive, and they don’t make tools like they used to! So hang on to that axe head and restore it with this simple axe restoration tutorial.
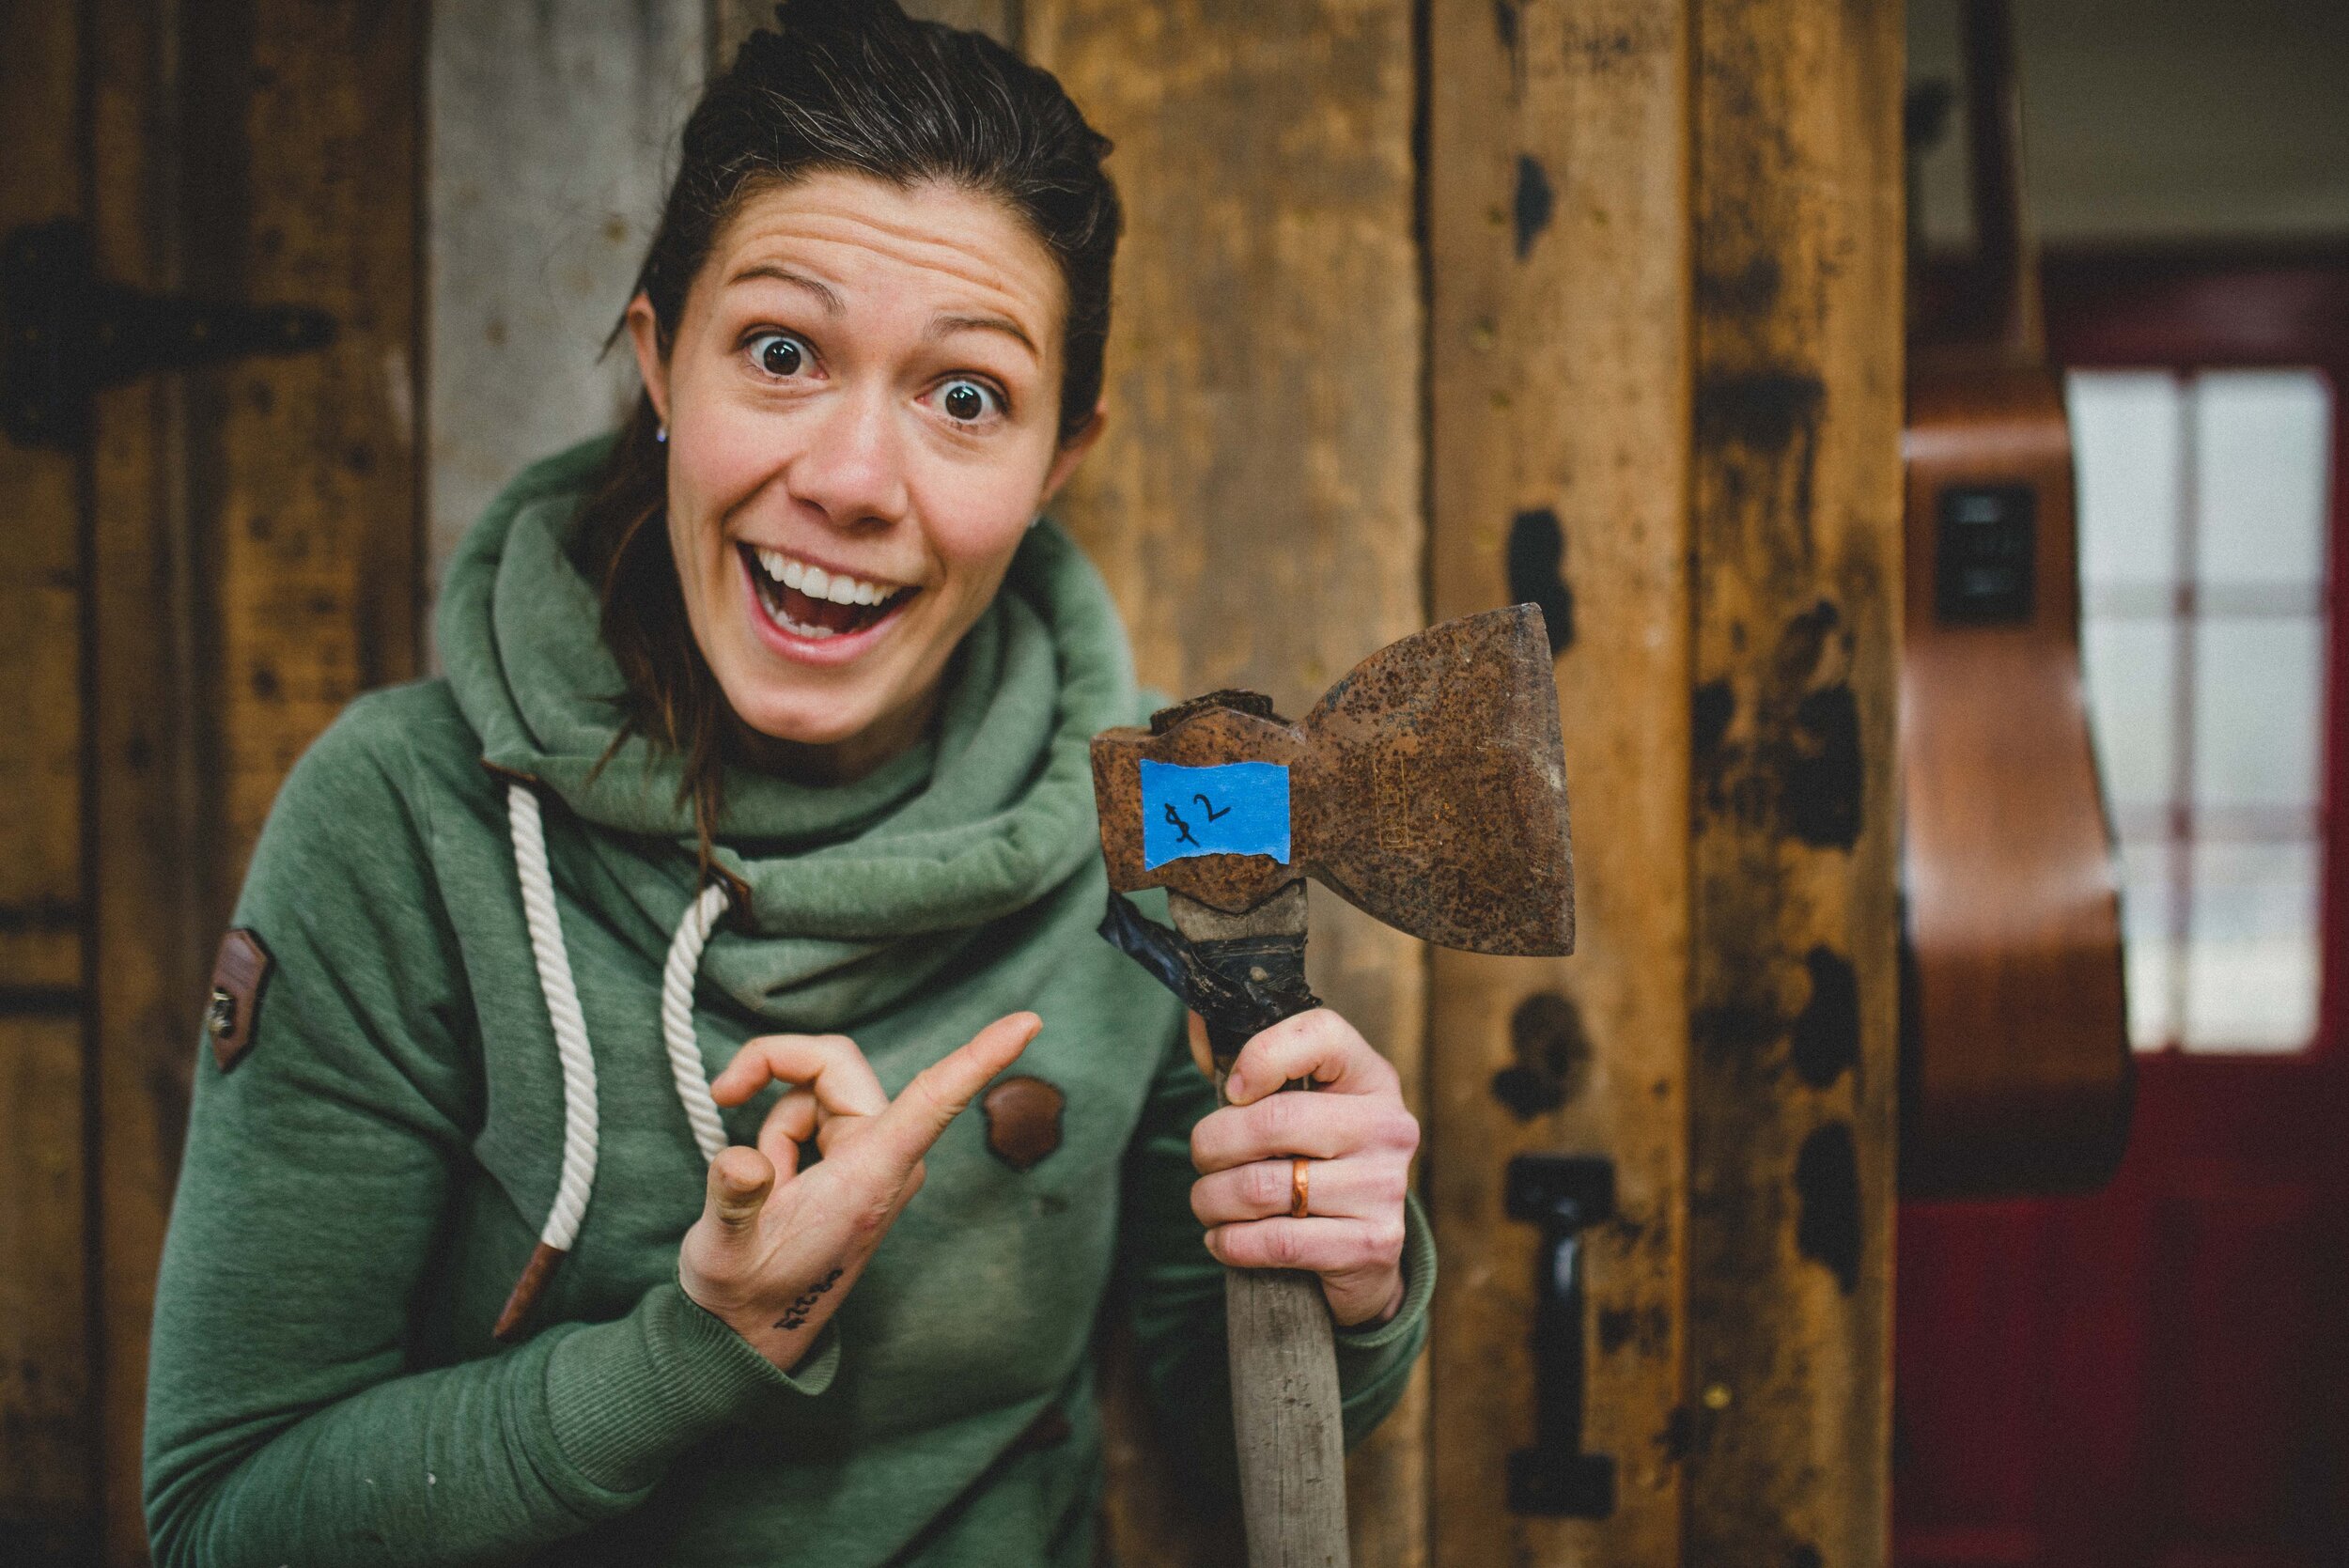
One of the things I really love is restoring old tools and making them useful again, because then every time you use them, you're holding a piece of history and making more history yourself. Today I’m restoring a $2 garage sale axe as well as a hewing hatchet that used to belong to my grandfather.
This is extra special because I happen to be ambidextrous, so a left-handed and right-handed hewing hatchet set for breaking down spoon stock will come in pretty dang handy.
After restoring the axe head, I’ll teach you how to hang an axe handle in this blog post.

Remove axe head from handle
The first thing you need to do, unless you’re working with an axe without a handle, is to use whatever means necessary to get the old head off. My favorite methods involve a hammer, nailset, saw, and a drill and bit if things get really tricky. (Keep in mind there might be metal bits in there, so don’t use your fancy wood bits here.

Wash the Axe Head
After we've got all the wood removed, we are going to use hot soapy water, dish soap and an abrasive pad to remove as much of the surface rust, dirt and grime off of the axe as possible. The more you can get down into any possible pitting with the washing, the better off you'll be when it comes to soaking it in citric acid, which is the next step.

Remove the rust
In order to remove the remaining rust, add a tablespoon of citric acid to a quart size or larger container of warm water and stir until dissolved. Pretty quickly, we should start to see little bubbles coming up off of the tools. That's the citric acid basically eating away the rust.

Trace your new handle
Picking axe handle material can be tough, but the joy of making your own means you get the chance to experiment a little. We want to use hardwood, oak and hickory are traditionally used for this job, but what is far more important than the species of wood is that the grain matches your handle shape.
For these axe handles, I used a piece of hickory and a piece of sassafras. I’ve been known to use fruit woods for handles in the past too. (Sassafras is a lot lighter and softer than hickory so the jury’s out on how well this handle will hold up, but, for what it’s worth, I’ve been using these axes for a few weeks now and I actually far prefer the feel of the axe with the Sassy handle).
For tool handles, I like to make a pattern first. The shape is pretty arbitrary, but if you find a tool handle you like, like another axe or hammer that feels comfortable in your hand, use that as your pattern. A paper pattern isn’t necessary, but it is helpful because the most crucial thing about having a strong axe handle is making sure there’s plenty of continuous grain running through the whole thing. The paper allows you to move it around, spin the wood in different ways to try and get the best continuous grain for your handle.
By continuous grain, I mean those little lines that are on the wood. You want as many of them as you can running along the whole length of the handle, especially if your handle has bends or curves in it. See if you can’t find a section of those lines that match that bend or curve, as I did in the picture above.
This also holds true when carving a wooden spoon! If you’ve had a wooden spoon or spatula break on you, chances are there wasn’t much continuous grain running through the utencil.

Cut and Shape your new handle
Technically we are making a 3-dimensional object here, so a little extra care needs to be taken in the cutting and shaping process.
First, while the wood is still flat, get the basic shape cut, then smoothed out. THEN start working the corners. Cut your basic shape out using a bandsaw, jigsaw, or chop it down to your lines with another axe. A good rule of thumb is to work down to your marker line but never remove it until you’re ready for your finishing strokes. Your marker line is your safe place.
When you’ve got the “cookie-cutter” shape of your axe handle defined, then start working the corners and do the final shaping. Again, guidelines are going to be your friend. I mark out 1/4” in from the outside on all sides of the handle to start working towards round. Watch the video above to see my tips on how to do this.
PRO TIP: Being intentional about how you remove the stock for the handle as you shape it will be hugely helpful in keeping it even along its length. I like to use the mantra “corner, corner, middle” for all my carving. I work the length of each of the corners first because cutting corners is easy. For this shaping process, use whatever tools you’re comfortable with. For me, that’s knives, drawknives and spokeshaves. For you that might be a power sander, for others, it may be a file. As long as the wood gets removed evenly along the length, you’ll be happy in the end.

Remove Axe Head from Citric Acid
After 30 minutes or so of soaking in the citric acid, take an abrasive pad and scrub the axe head. Make sure you are wearing gloves for this step! Once the remaining rust is removed, rinse the axe head thoroughly with water and pat dry with a paper towel.
When we've got the axe heads out of their chemical bath and all wiped off, we can go ahead and hang our handles. It's actually way easier to sharpen the axes without the handle on them, so we're going to do that first.

Grinding
The next step is to remove the bulk of that initial material with a process I'm going to call grinding. Even though we're using sandpaper, we're going to be removing a lot of material in a hurry.
After the grinding process, then we'll go through the sharpening and honing process. This just means that you're starting with larger abrasives and you're moving to smaller abrasives.
And I want to just remove material by sliding it back and forth on this surface. Our mantra when we're restoring anything or when we're first learning how to sharpen is to stop and check our progress constantly. You always want to check and make sure you didn't make a mistake before you've made a mistake that's too big to come back from.

Flattening the Back of the Axe
So now is the fun part: flattening the back. We have a secret weapon when it comes to this part, a sharpie. This is going to help us to check our progress.
When you're learning how to sharpen, you want to check your progress often. That way you can stop yourself from making big, long-term mistakes before it’s too late.
The only portion of the axe head that we really care about is that leading edge. We don’t need to cover the entire back with sharpie! There's a gentle balance here between where I know that it's very flat and where I'm just needlessly removing tons and tons of material from this entire back.
Use a flat surface
When sharpening the axe it’s extremely important to work on a perfectly flat surface where the bevel meets the edge for a zero radius intersection across the entire edge.
To do this I love using a glass plate as well as some cut offs of machine shop wet/dry sandpaper (these are perfect because you can get a whole pack for about $11). To grab my favorite woodworking supplies, visit my shop here and grab all your favorite tools!

Grinding the Bevel With the File
We're going to put what's called a tiny back bevel on this axe and that is going to help us alleviate some of the issues that we might have with pitting. We don't actually have to flatten the entire back of the axe, once we've gotten it reasonably flat, we can raise it up ever so slightly by using a little feeler gauge and we'll save ourselves a whole lot of time and effort.
Honing with the Strop
A strop is a piece of leather soaked in oil and then charged with this waxy abrasive compound. A strop gives you a little bit of an insurance policy. We are still abrading material. Because that leather is a little bit flexible, it does allow us to make sure to kind of get rid of any little errors that we may have introduced.

Carve the Handle
As I'm fitting the axe handle into the head, I want to use my sharpie again and, using my fingers as guides, project out where I need to carve based on the lines I already marked. This is going to help me to make sure that I'm removing material evenly and that that axe head ends up getting hung straight. Now I can just use my carving knife to remove that material.
At this point, I like to pretend I’m putting the head on to make sure I’m fitting it correctly to either a left or right-handed axe. Because this was my grandpa’s axe, I’m going to keep it as a left-handed axe as he was left-handed. I happen to be ambidextrous, so I like having both left and right-handed tools around for any friends that need one or the other.

Check for Fit
As I’m carving, I want to continually be checking for fit. If I line up my handle with my axe head and look down at it from the top, I should be able to see light coming through certain areas. That will tell me where my high points are on the handle and where I need to carve a bit more for that perfect fit.

Wedge the Handle
The final step is to carve a small wedge that will fit into the head of the axe through to the handle and “seat” it in place. I simply carved one by hand, then drove it in with a hammer.
I explain this step in much more detail in this post on how to make and hang an axe handle.

And that’s it! Your axe should now be ready to use. With proper care, your axe should now last for years! Be sure to check out Josh and my courses The Way of the Axe and the Hatchet, as well as How to Sharpen Anything at the School of All Trades.