
How to Fix Your Soil
Learn to make your own compost tea, fertilizer, and soil amendments using free things readily available to cultivate an abundant garden as nature intended.


We can take all kinds of helpful cues from the forest floor on how to best manage our own gardens, big or small. The forest has been an inspiration and an aid in creating a positive growing environment for my plants as I have implemented my take on the Back To Eden gardening method. (For more on this checkout Paul Gautschi’s Back to Eden Documentary.)
This method uses wood mulch, all kinds of mycelium, and helpful fungal and microbial growth to create vibrant, healthy soil for a self-watering, no-weed, organic garden.
When I first began my organic garden, I did not have good soil. It was in a space where there was just bare dirt and a whole lot of dandelions. By using these methods, my organic vegetable garden is thriving because it is now full of naturally rich soil.
What is Back to Eden Gardening?
Back to Eden Gardening is a planting method that takes advantage of the existing ecosystem by studying what is already in nature, and mirroring that environment to promote the success of what is intentionally planted in our gardens.
Benefits of Back to Eden Gardening
Many gardeners find themselves working against nature with artificial pesticides, fertilizers, and soil amendments. Not only is this expensive, but is time-intensive, and often unhealthy for the environment and the food you are producing. Back to Eden Gardening allows us to work with nature by using what is already readily available and free, to build a naturally pest resistant, environmentally beneficial, resilient, sustainable, low maintenance, high yield garden.

How to Start a Back to Eden Garden
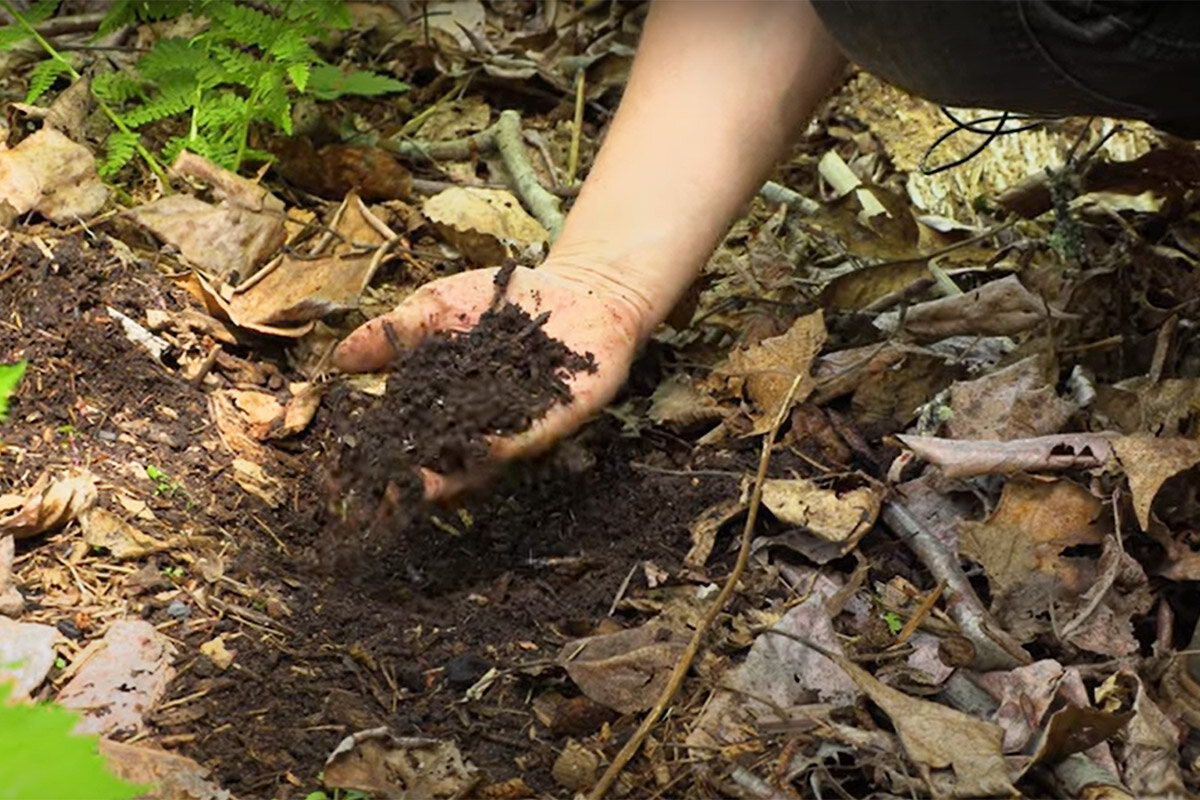
If you pay attention, everything you need to know about your garden is all available in nature. I was fortunate to have a forested area on my property, and I took time to observe the forest floor. I noticed the natural mulch from the dead leaves and decaying wood chips. Wood chips act as a sponge, soaking up the water as it rains, and releasing the water into the ground over time.
When I dug past the top layer, I found moist soil that the natural mulch had continued to water even though it hadn’t rained in days. I found a seedling that started to sprout up through the fine soil and had noticed that if large pieces of wood chips were covering that soil, the seedling wouldn’t have been able to sprout. Additionally, there were no other plants close by competing for sunshine that would have prohibited the seedling from growing.
I scooped a handful of the soil into my hand and noticed it had several little white dots scattered throughout. These are mycelium which is a very beneficial fungal growth.
I took all of these observations and returned to implement in my own vegetable gardening what I had found.

Applying What I Observed
Wood Chips - Our local arborists (or local tree surgeons) use wood chippers to dispose of their wood waste products, and they give these wood chips away for free. I re-created the conditions on the forest floor by using these free wood chips as my mulch to re-use this waste product back into something useful.
Since the wood chips on the forest floor have been decaying for quite some time, I don’t use the wood chips from the arborists in my garden right away. For the first year or so, I will use them in my garden pathways to get that decaying process started. Not only does a layer of wood chips act as a sponge to self-water a garden, but it also adds to and conditions the soil as it breaks down, as well as acting as a barrier to help keep weed seeds from germinating, and weeds from growing.
Garden Design - Although the wood chips are beneficial to help keep weeds from growing, they aren’t an ideal place for seedlings to grow. Seeds and seedlings cannot break through big particles like wood chips and need fine soil to succeed.
I mimicked the area where I found the seedling in the forest by planting seeds and seedlings in nutrient-rich soil with plenty of spacing from other plants that will compete for sunshine. After the plants are hearty and established is when a layer of wood chip mulch will be introduced all around the plant where you don’t want weeds to grow.
Top Dressing - Instead of using a layer of mulch all the way up directly next to the plant, I use a top dressing fertilizer which is a layer of compost made from a mixture of wood chips and animal compost. The addition of animal compost works to create a lighter texture and provides added nutrients to enhance the soil.
Soil Health - Weeds in our garden are another cue we can take from the forest to tell us about our soil. For example, long viney plants grow in soil that is depleted of nitrogen, and taproot plants (such as dandelions) are a good indication that the nutrients they need are deep down meaning there is nothing left in the top of the soil to feed the plants.
There are two ways these weeds can be used to build the soil back up. You can simply trim the weeds, and leave them to decompose back into the soil, or you can take the weeds to chop up into a simple compost tea.

Simple Compost Tea
Also known as the “Lazy Man’s Compost Tea”. This is a great way to use up items that are just laying around your home, backyard and garden areas to give your garden an extra boost of nutrition. For a more specific compost tea recipe click here.
Supplies Needed
5 Gallon Bucket
Water
Weeds
Micilleum Rich Soil
Top Dressing (Animal Compost Mixed w/Wood Chips)
Watering Can
Instructions
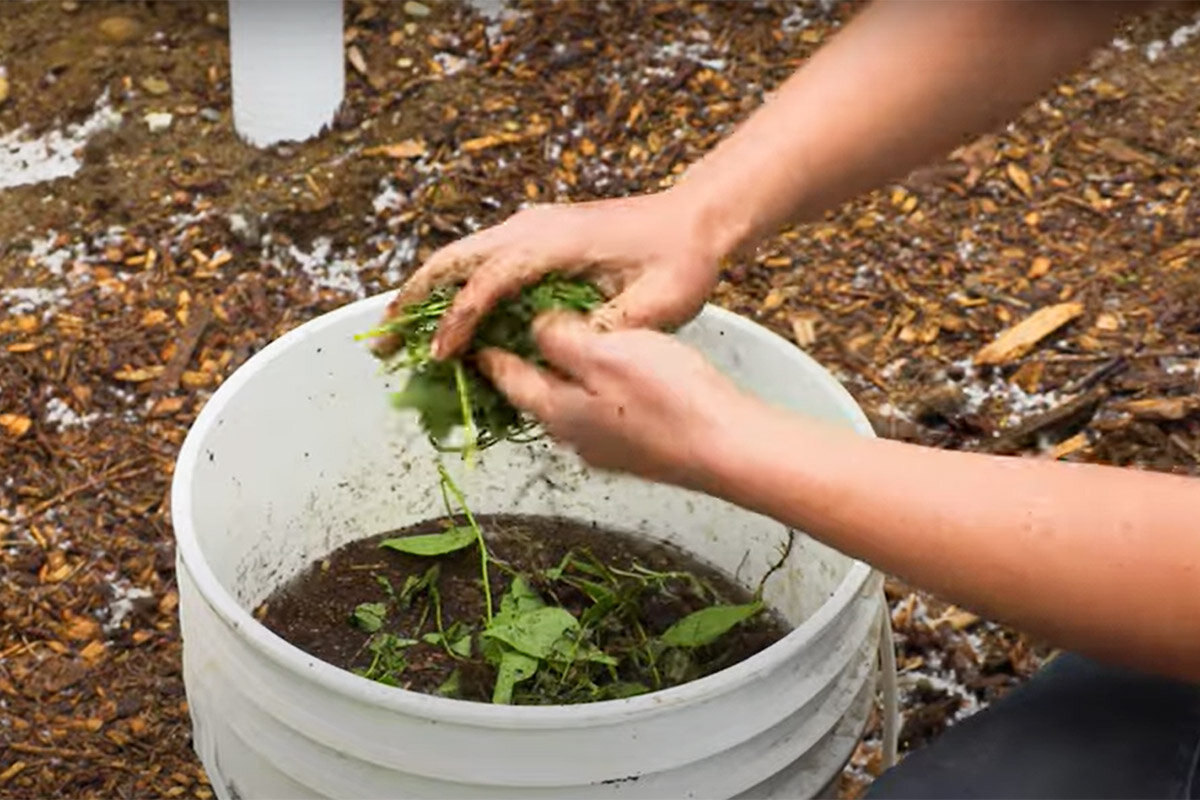
To make compost tea, simply fill a 5-gallon bucket about halfway with water.
Pull some weeds from the garden, and break them up into the water.
Add a couple of handfuls of mycelium-rich soil from the forest, and a few handfuls of top dressing (or chicken manure and wood shavings recently cleaned out of your chicken coop).
Stir together, and allow the tea to ferment for a few weeks or a month. The longer it ferments, the more concentrated it will become.
To use, just add a few tablespoons to a watering can, fill with water, and water your plants throughout the growing season.
Note: This method works great for smaller gardens and garden beds, but if you plan to garden on a larger scale, I recommend following the compost tea recipe and the DIY compost tea brewer linked below!