
How to Sharpen a Chisel
You don’t necessarily need to spend a lot of money on your tools for them to work well and last a long time. Knowing how to sharpen a chisel and maintain it for a lifetime’s worth of use is something all craftsmen and woodworkers should know. Learn how to properly sharpen your tools with the tips in this post.
The Difference Between Hardware Store and More Expensive Chisels
Oftentimes the hardware store chisels don’t come sharpened very well. They’re being sharpened by a machine, and not honed in with precision by hand. Josh Nava (my business partner) and I have taught thousands of people how to sharpen anything. If you need a good refresher, I highly recommend our class.
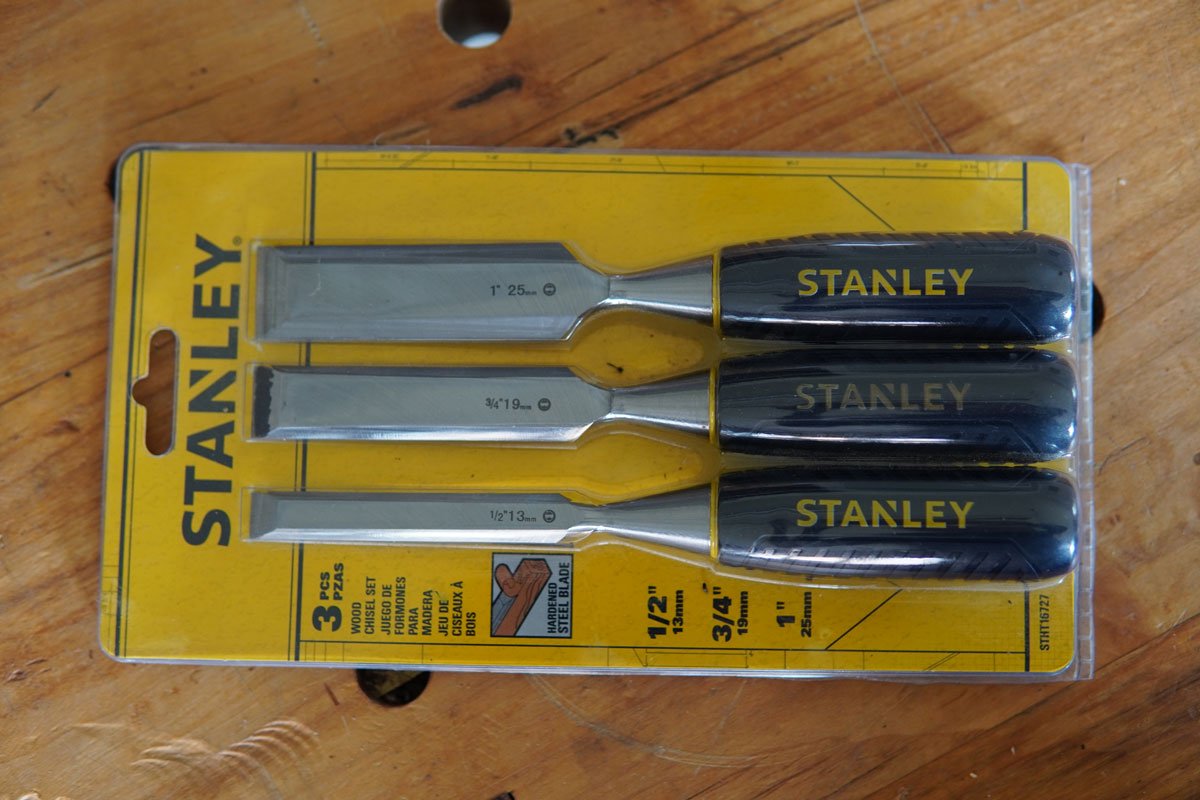
Not everyone has access to amazing rummage sales or antique stores stocked with cheap antique tools, so let’s take an $11 chisel from Home Depot and make it work like a $55 Lie-Nielsen Chisel.
How to Sharpen a Chisel
Here’s an eagle-eye view of what we’ll do to make the chisel work how it should:
Gather sharpening materials
Learn proper body mechanics for hand sharpening
Flatten the back of our chisel, raise a burr across the entire bevel
Remove the factory scratch pattern from the bevel, raise a burr across the entire back
Refine the edge
Strop
Troubleshoot
Ease the factory edges of the chisel to keep “slide” cuts to a minimum
Chisel Myths
Grinding an edge with a power grinder creates a sharp “enough” edge.
It depends on what you’re using your tool for - splitting tools that wedge wood fibers apart, tools that are going to be spinning fast and getting lots of abuse (lawnmower blades), some turning tools… those are fine right off the grinder.
Tools that are meant to slice wood, like chisels, need to be further refined.
Chisels come sharp right out of the box.
NO! Even most high-end tools need to be honed out of the box, low-end tools need machined edges eased, backs flattened, grinder scratches polished out, and bevels refined. Think of it this way: generally with tools, we either pay more for a human to look at the tool during the manufacturing process, or we pay less for the tool upfront and need to spend more of our time refining it.
Chisels also make great nail prybars, paint can openers, and screwdrivers.
If you ever take the time to refine and truly sharpen your chisels, you’ll never want to see them touch anything but wood again. :)
What Makes a Sharp Chisel?
A perfectly flat back (which means that we'll probably have to flatten it).
The bevel meets the flat back at the entire cutting edge perfectly along its entire edge, creating what’s known as a zero radius intersection (there’s no “rounded” or uneven bits along the cutting edge).
The edge has been refined/honed so all prior grit scratches have been polished out.
A great way to test for flatness is to hold your blade in one hand and a straight edge in the other (if possible I do this before buying chisels and plane blades).
Holding the blade up to the light, lay the straight edge on the back of the blade just near the cutting edge. Tip the straight edge and look for light passing between the blade back and the ruler.
Light passing through certain areas indicates low points on the blade back (aka it isn’t flat). The blade can be corrected, but we want to minimize our time and effort spent here if possible.

How Sharp Does a Chisel Need to Be?
Contrary to most belief, a dull chisel is far more dangerous than a sharp one, because excessive force must be applied for the chisel to “work” properly, which provides ample opportunity for dangerous slips and “whoopsies.”
Lots of folks shave some arm hair to test chisel sharpness, but that’s gross and not necessarily a great gauge of the overall sharpness of the entire blade (not to mention I’ve cut myself doing that more than actual woodwork). Cutting paper is also counterproductive because not only does it not test your blade along its length, the paper actually contains micro-abrasives that will degrade your freshly sharpened edge.
A “sharp” chisel should be able to take a full width, end-grain shaving from a board with hand pressure alone. A dull chisel will create dust rather than shavings and/or leave behind scratches or visible lines in the wood grain. This can be accomplished by achieving a flat back and a well-polished bevel at 3000 grit.
Many people spend lots of time and money on equipment that will get them a 20,000 grit mirror polished edge, but that edge will not be able to perform measurably differently (especially in cheaper steel like in these $11 chisels) than the 3000 grit polished edge.
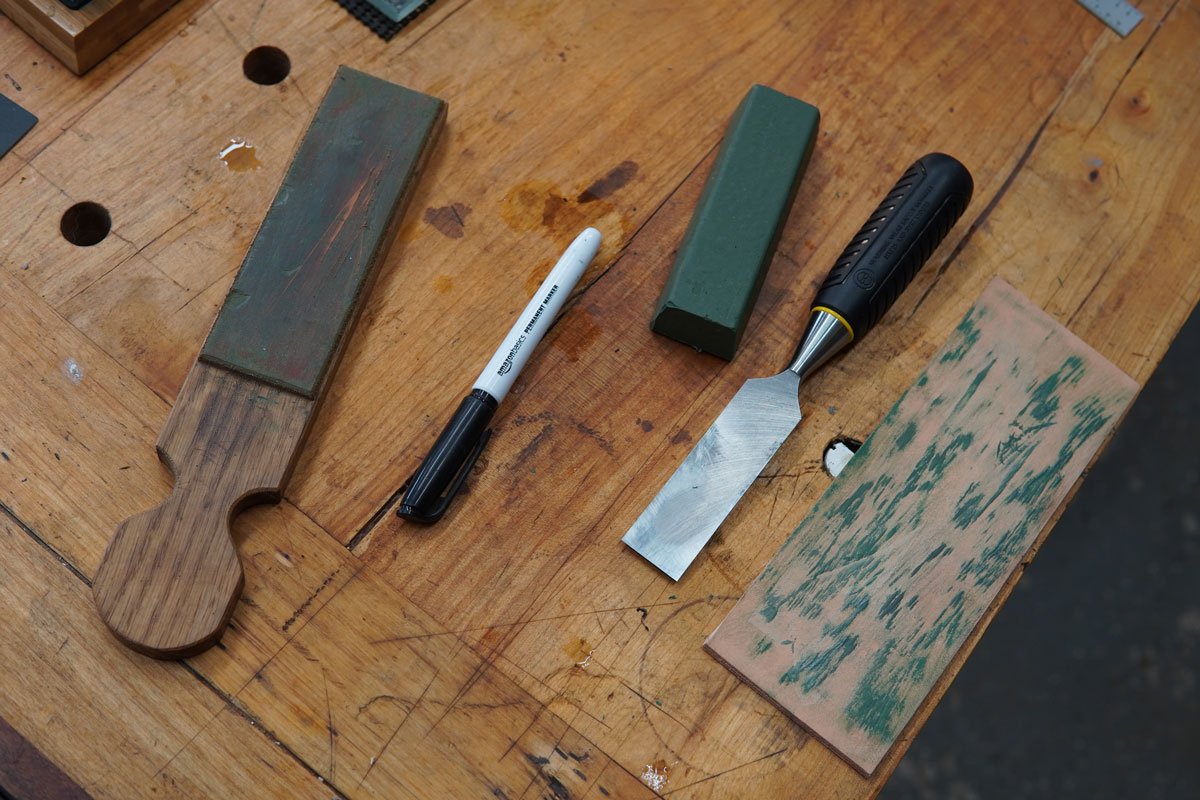
Sharpening Materials
Abrasives (diamond plates, water stones, oil stones, glass plates, wet/dry sandpaper)
Lubricant (spray bottle of water/oil/honing fluid)
Tool care (oil, microfiber cloths)
Diagnostic tools (sharpie, magnifier/magnifying light, straight edge)
Strop and abrasive compound (there are many kinds of strops, check out my Amazon store for my top picks)
My preferred sharpening kit is a diamond plate for flattening combined with two grits of water stones. Diamond plates are ideal for general tool rehabbing (but especially back-flattening) because they are, themselves, perfectly flat. They are a fantastic investment, but they are a little bit on the pricey side.
A piece of plate glass paired with wet/dry sandpaper is a far more affordable way to achieve a similar result in the beginning. You can use a diamond plate with different grits of sandpaper as your entire sharpening setup, and/or if you ever invest in water stones, you can use plate glass/sandpaper to keep your water stones flat.
DIY Sharpening Options
Another passable “Uber economy” way to create your own sharpening “stones” is to use flat pieces of wood with some wet, dry sandpaper adhered to them. I've got a link for the cheapest packs of wet/dry sandpaper I’ve found here. If you’ve got a table saw with a cast iron top, or a scrap of granite or melamine that is really flat, a piece of plate glass, etc, you can use those as backing for your wet/dry sandpaper as well, you just need to KNOW that you’re starting with something truly flat so you can transfer that flatness onto your blade.
A huge reason Diamond plates were well worth the investment for me is because I also use water stones for a lot of my sharpening processes. Water stones are soft and wear quickly, and it’s crucial you keep them absolutely flat- which is very difficult to do unless you have something you KNOW is flat that you can always return to.
Which Grit Is Right for the Job?
If the back of your blade is REALLY out of flat, start with a 150 grit abrasive. If it’s nominally out of flat, start between 250-1000 grit, depending on the amount of material you need to remove.
PRO TIP: I always like to use time-saving common sense here: the lower the grit I’m using, the faster I’m going to remove material, but the low-grit scratches we introduce must also get polished out with successive work on higher grit abrasives, so there’s a law of diminishing returns to be considered there.
If you luck out and get a really flat chisel out of the box, a few swipes on a 1000 grit stone might reveal there’s not much work at all to be done, just remember that cheaper tools have not likely been very “refined,” so you need to make sure to remove enough material this first sharpening session to get all the way behind the original scratch pattern left behind by the grinding or surfacing tool that was used in the manufacturing process and really polish the back of your chisel.
If you skip this step, your freshly sharpened edge will be brittle and will quickly reveal those deeper scratches in an almost saw-tooth-like pattern at the tip of your blade.
A Word on Grits (no cheese)
When it comes to sharpening stones and “grits,” there are tons of schools of thought, but I like to keep my sharpening process as simple (and inexpensive) as I possibly can, without measurably changing my results.
That’s why my “bare bones” toolkit looks like this:
250 grit diamond plate for “grinding” new bevels when I hit a nail or need to fix something and for flattening really out of flat blades.
Glass plate like this from Amazon is a fairly cheap way to buy some peace of mind for a sandpaper/abrasive paste sharpening setup.
1000 grit diamond plate for flattening my water stones and doing refining work on stubborn blades.
You don’t need the intermediate grits, and you don’t need to go above 8000 grit, just trust me on that. In fact, you don’t *really* need to go above 3000 grit, like, ever, but I like a little extra polish, and as it happens, I don’t have a 3000 grit stone. (There are probably a few thousand “Shapton” stone users with several thousand dollars invested in every single grit from 1000-20,000 yelling at me from their keyboards right now, but that is another debate for another time.)
Starting Grit
If I start my flattening/grinding process at 250 grit, I’ll get the blade flat and the bevel “ground” on the 250 grit, then I’ll use some intermediate grits of wet/dry sandpaper to polish out the 250 grit scratches my diamond plate leaves on the blade (250 to 400, 400 to 600 or 800).
Finishing Grit
Then I move to my 1000 grit diamond plate. Sandpaper is pretty easy to get in just about every grit, and it’s a great option when you’re starting out, but if you’re going to use sandpaper, it is absolutely crucial your backing material (wood, cast iron, tile, marble, glass plate- whatever) is TOTALLY FLAT, or you’ll be replicating the error of the un-flat abrasive directly into your blade. Diamond plates often come in grits (or grades) like “Fine” and “Extra Fine.” As close as I can tell, a Fine is about 1000 grit, an “Extra fine” is about 3000 grit.
A combination plate or stone that’s 250/1000 or 1000/3000 or 1000/8000 will save you some dough and be all that you’ll ever need for maintaining your tools, especially if you sharpen regularly.
How to Flatten the back of a chisel:
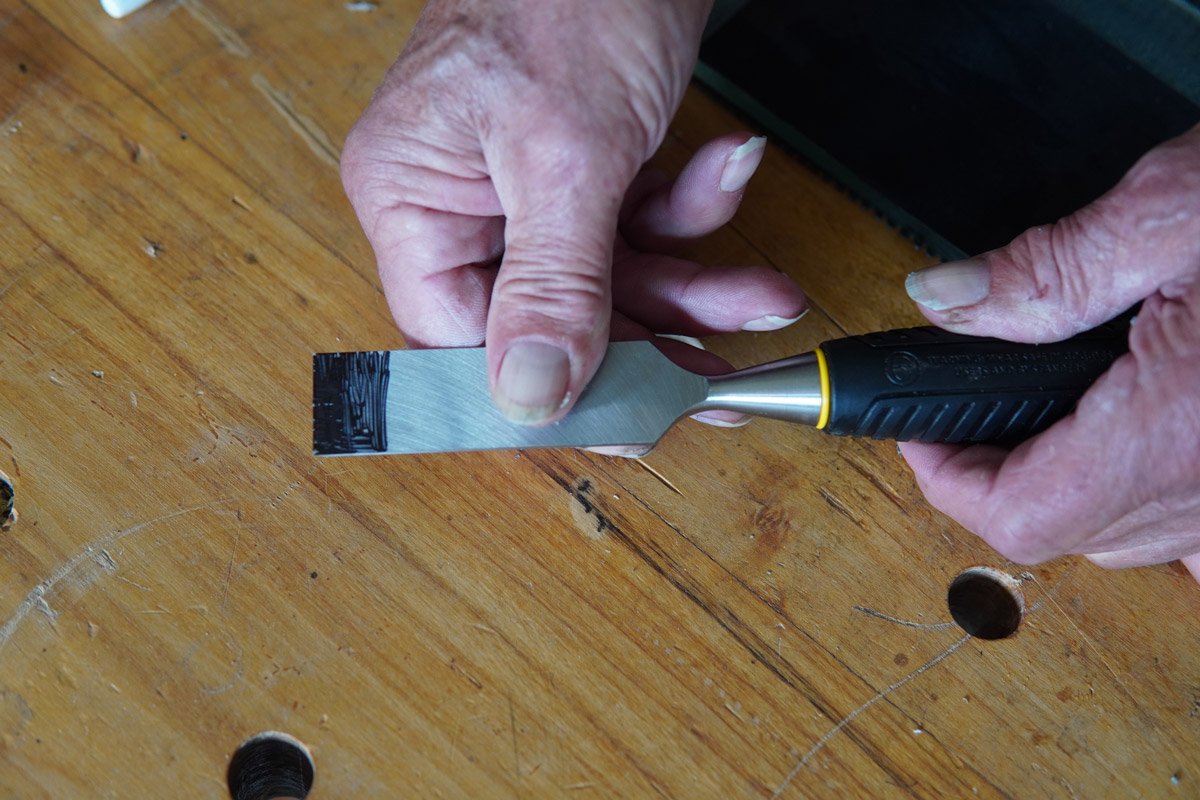
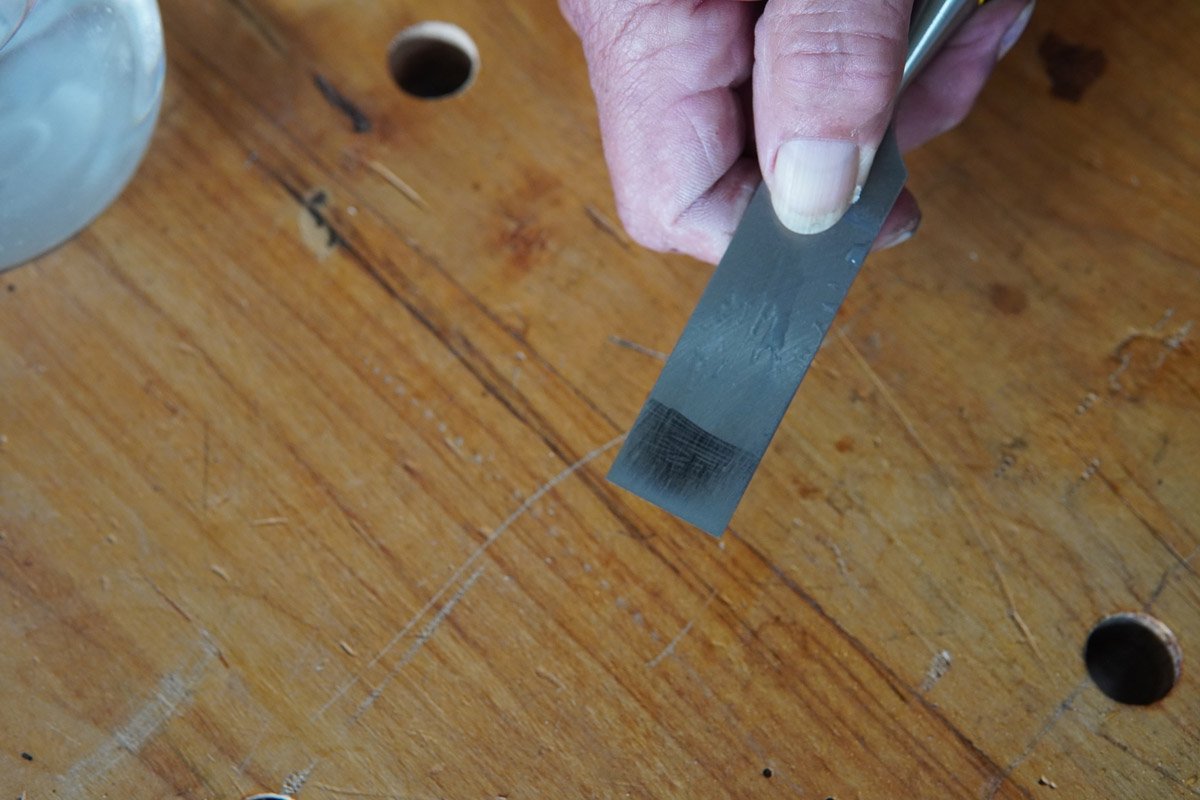
Using a Sharpie, blackout the back of your chisel. After the ruler, this is your next “progress” gauge. Every time you rub your chisel on your stone, the sharpie will be removed and the tool will become “shiny” on the high spots touching the stone. This is also a great diagnostic tool to let us know if we are introducing errors of our own within the sharpening process by pushing too hard on one side or another, with uncontrolled or unintentional movements (see “body position” below)
Every 5-10 strokes re-apply your sharpie, take a few strokes, check your progress. As you’re learning, the more often you stop, check, and reapply, the better, because you’ll have a much better picture of what is actually happening with each stroke you make. You’ll be able to tell if you’re pushing harder on one side or the other, if you’re unconsciously raising the back up while flattening, or if you’re accidentally rounding your bevel over while honing.

Lubrication is important
Whenever you’re removing metal, lubrication is going to make things slide around easier and with less friction (which often causes unintentional movement/chatter).
I like water because I use water stones, diamond plates, and wet-dry sandpaper, so I can use the same lubricant for all of them. If you’re using oil stones, diamond plates, or wet/dry sandpaper, you can also use oil (be sure it’s non-viscous and lightweight, something like jojoba oil is better than thicker, dust attractant oils like mineral spirits).
Great things to have on hand are a spray bottle of water, a little spritzer of oil (I like jojoba oil), and two microfiber cloths (one for wiping away water and one for wiping the tool with oil after sharpening to prevent rust).
PRO TIP: I actually keep one microfiber cloth “charged” with oil in a little plastic baggie to keep the oily rag from seeping on anything I don’t want it to and to help me save on oil (I’m very frugal, in case we haven’t realized this by now...)
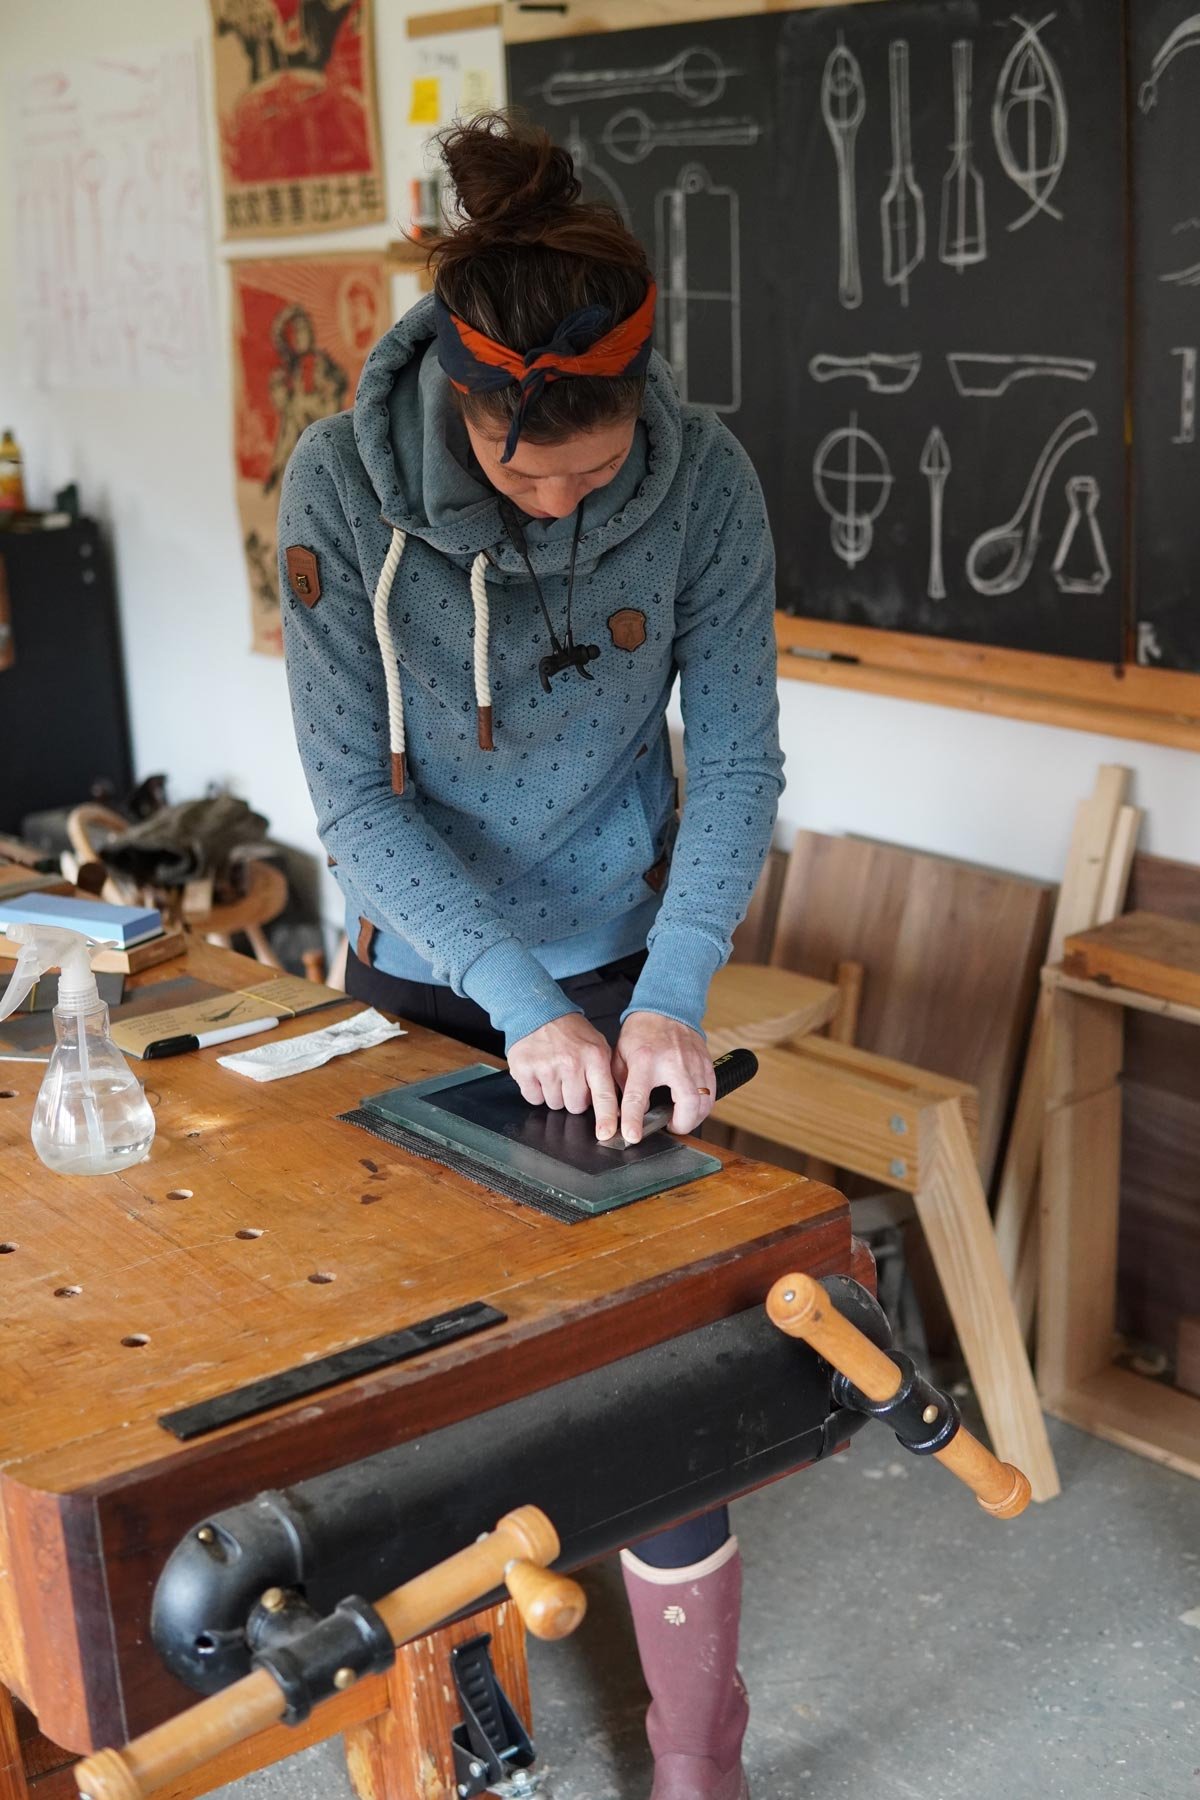
Body Position
When sharpening, I want to eliminate as many variables as I possibly can. We are trying to make our bodies move like a machine, and bodies don’t naturally want to do that, so we need to figure out how to move as few parts in the fewest ways possible and use our diagnostic tools a TON so we can figure out what’s going wrong where if things aren’t working right.
Because our bodies move unpredictably, it’s important to work at a proper height and to learn to lock your body parts against one another/against the bench as often as possible. It’s also important to learn how to move in a more controlled manner (shifting weight rather than extending limbs) and to use diagnostic tools to give us regular feedback about how we’re doing so we can adjust our techniques accordingly.
Things like a sharpie marker, a straight edge, a magnifying light, feeling for a burr (more on that later), all help us to identify and eliminate potential problems as they arrive. If we go slow and use these feedback tools a ton at the beginning, we’ll be less likely to develop “bad habits” that don’t serve us and later need to be corrected.
Ideal Height
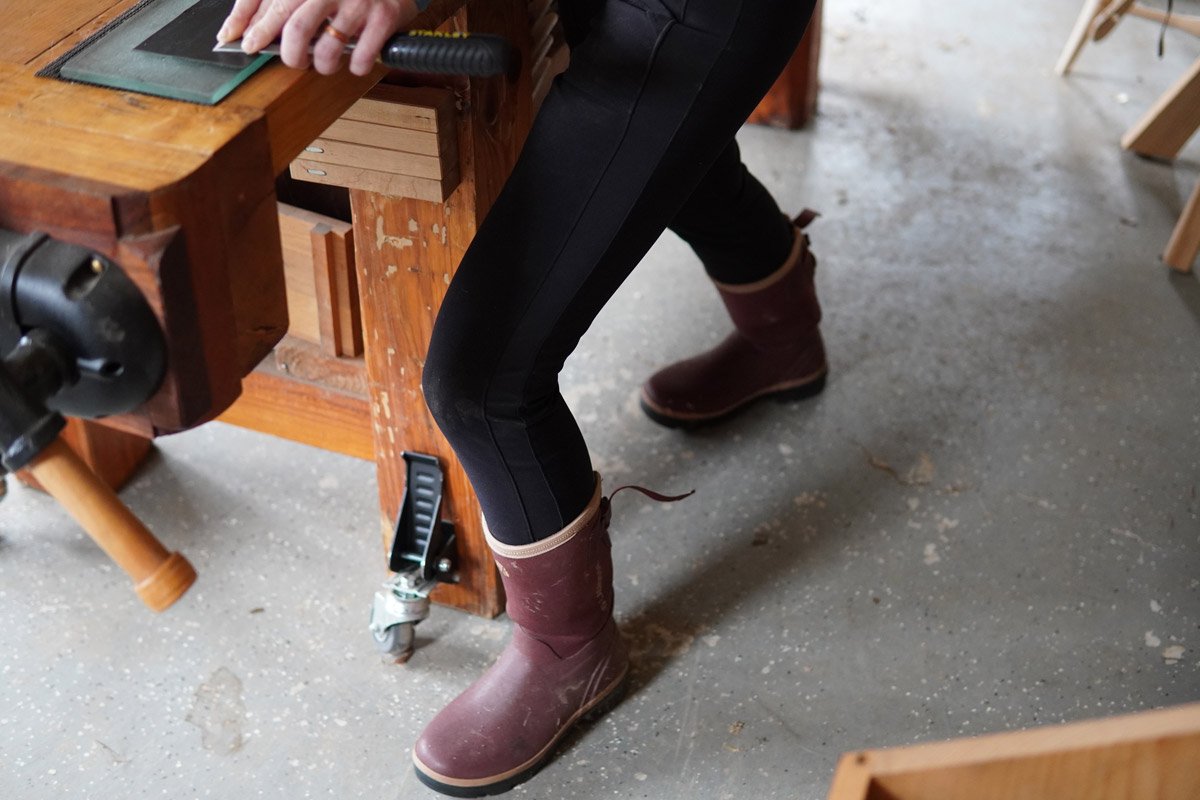
The ideal height for sharpening is with your arms at your sides, with your elbows slightly bent, you can comfortably lay your palms on the table/bench (36” for most people). The table/bench needs to be as sturdy as possible, so as not to shake, wobble or vibrate as you’re sharpening your tools.
If possible, it’s great to have an open-front table that allows you to extend your dominant foot slightly beneath the table/bench top so your center of gravity is directly over the stone. At times, it’s also helpful to have the option to brace your thigh/waist against the edge of the table/bench. *It should be noted that my workbench is actually technically too low for me to sharpen comfortably, but because I’ve become so comfortable with the movements that I can replicate them on basically any surface at this point.
Proper Stance
Standing at my workbench, my dominant foot is forward, slightly under the benchtop. My non-dominant foot is back slightly behind me, giving me a “power stance.” Think how your feet would naturally land if someone gave you a firm shove. My thigh/waist can comfortably shift forward to make solid contact with the front of the tabletop.

Proper Body Movement
With abs engaged, practice shifting your weight back and forward between your two feet. This is going to be the full movement for your sharpening technique, we’ll lock the rest of our body parts in place so this is the only part of our body generating movement.
The stone is on the tabletop directly in front of my dominant thigh, about an inch or two away from the table’s edge. Find where it’s comfortable for you to move with full control directly over the stone.
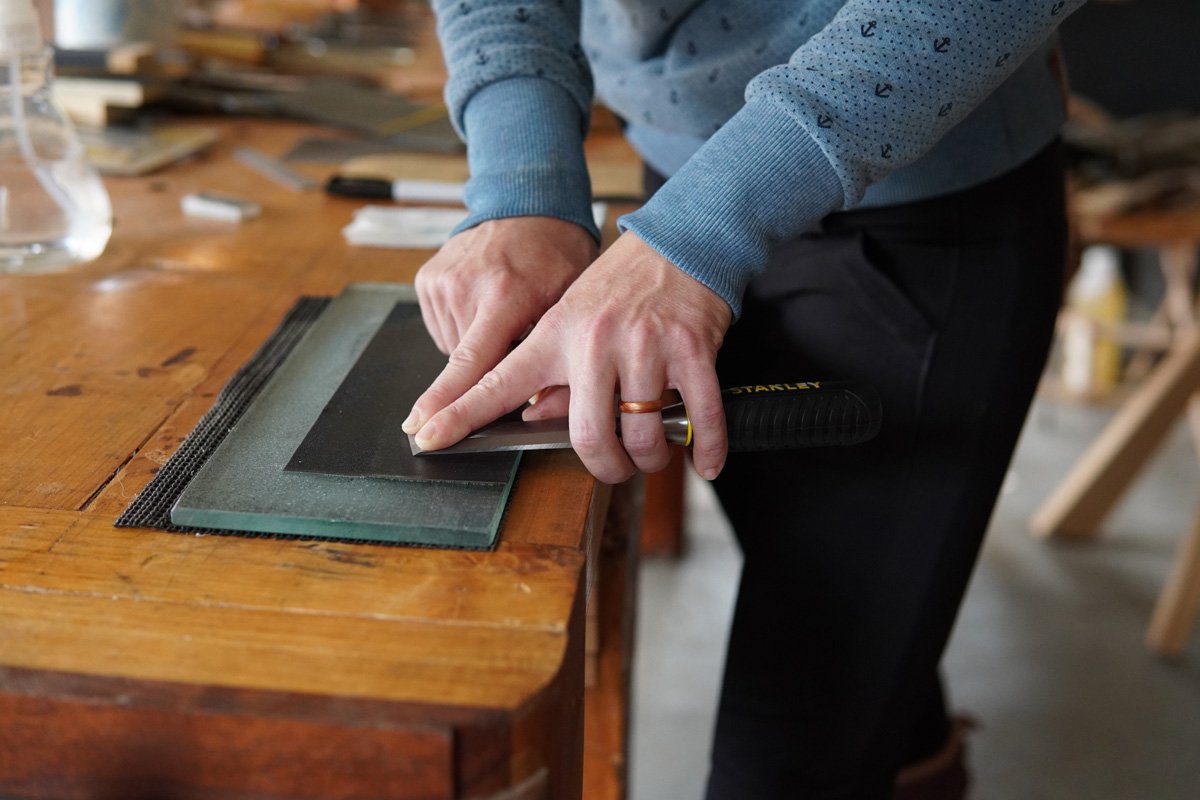
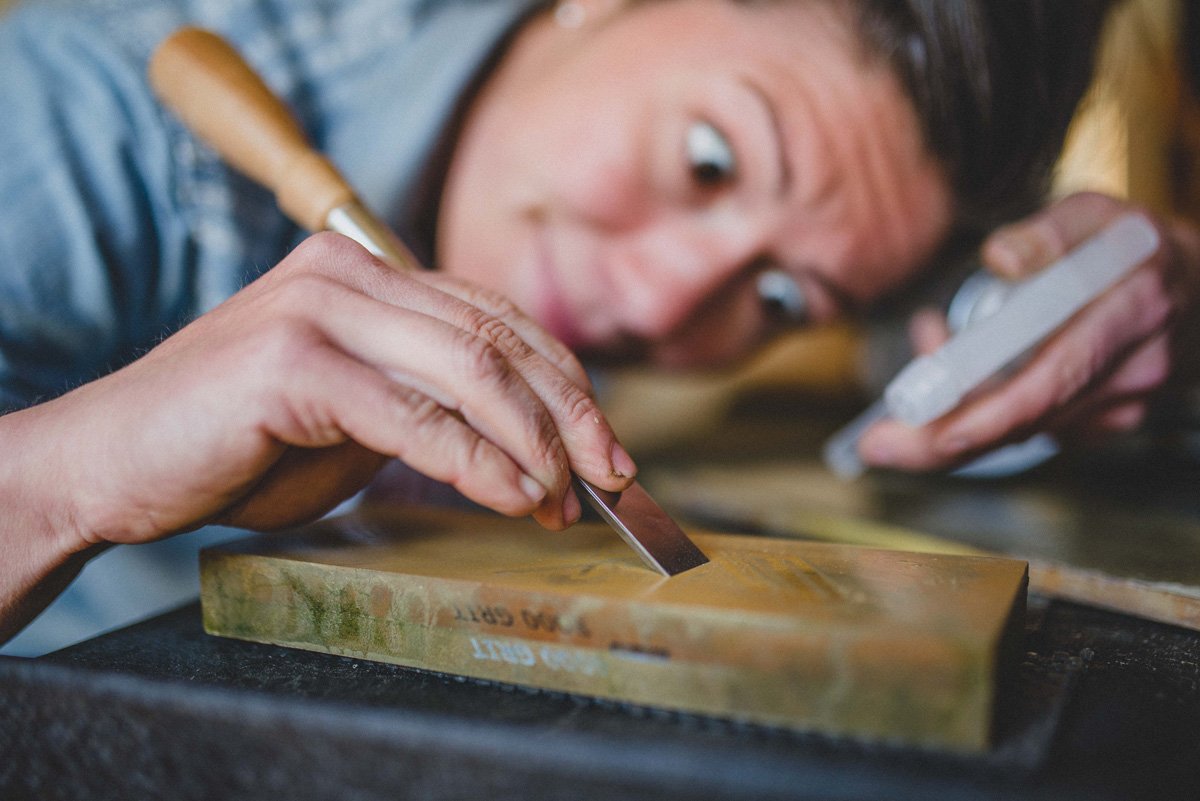
Hand Position for flattening
With my chisel back on the bench, perpendicular to my stone, blade leaning over the stone, I use the pointer fingers of my two hands to put pressure on either side of the bevel of the chisel, the pressure raising the back of the chisel up until the blade sits flat on the stone and the handle of the chisel is suspended in the air.
I wrap my pinky around the handle of the chisel to support it from below. I want the blade to stay flat on the stone, I’m careful not to lift or lower the handle at all with my balancing hand, I simply want to add support with my pinky so the back stays flat on the stone.
If you look closely, as you lift the chisel and find “flat” on the stone, you’ll see the water underneath the blade shoot out around the edges of the chisel, displaced by the flat back of the tool making contact with the flat surface. Looking for that water displacement is a great diagnostic tool/reset point. If you keep your stones flat and really dial in the back of the chisel, it’s possible to create a vacuum seal capable of suspending the entire chisel over the stone without support as that water gets displaced.
(Don’t do this over a concrete floor, and don’t try to catch the chisel if it falls… both are bad news… maybe just don’t test this theory!)
As I am sharpening/flattening, I am not applying a ton of pressure with my pointer fingers, I’m not lifting excessively with my pinky. We should see no “white knuckles” in this process. Pressing too firmly engages muscles we don’t want to engage and also creates ample opportunity to unknowingly be putting more pressure on one side or another, rounding over edges unintentionally.
Putting it all together
Leaning forward onto my dominant foot, putting my hands on the blade and raising it up to rest on the stone with my pointer fingers, curling my pinky below the handle for support, locking my wrists in that position and pressing my arms, elbows and everything I possibly can against my body, I engage my abs, I start at the top of my stone and rock back onto my back foot, which pulls the blade along the stone in a perfectly controlled manner. Rocking back onto my front foot pushes the blade the opposite direction, back and forth, back and forth.
As you’re getting started, it’s actually better to try to master the pull stroke on it’s own. It’s slow and tedious to set up, find flat, lock everything in place, and rock back, reset, find flat, lock everything in place, and rock back, but if you take your time here, if you mark and remark your sharpie and really master the pull-back, you can add the push-forward in later and you’ll be far better equipped to diagnose your push-forward issues (because there will likely be a lot of them-- the human body moves far more controllably in the pull-back manner than the push-forward manner).
Raising a burr
One really cool thing about metal is that when you remove metal, as you are when sanding it off with an abrasive surface, you're also moving metal, pushing it from one surface toward the opposing surface.
So as I remove metal from the back of my blades in the flattening process, I should actually feel what's called a Burr, starting to get pushed from the back of the chisel up towards the bevel. It's invisible to the eye until it gets quite large, but you can actually detect it easily with your fingertips. As you run your thumb from the top of the bevel toward the cutting edge, you’ll start to feel a little “catch” or “scratch” as the blade gets flattened and the metal gets moved.
When you’ve raised a Burr across the entire leading edge (detectable on the bevel side) you know you’ve got a flat back.
This can be a slow, painstaking process, but it only needs to be done once, and if you do it right, your chisel will thank you with a lifetime of good service. Because this process is so slow and painstaking though, it’s a great opportunity to really practice and ingrain the body mechanics needed to master the hand sharpening process.
The bevel should not need nearly as much work as the back, and if we don’t need to do a ton of refinement on the bevel, I’d actually start moving up through the grits on the back now, and this should go pretty quickly because if your back is already flat, you’re not removing a ton of material here, you’re just polishing away the scratch pattern of the last grit you used.
If you started at 250, move up to 400 and polish away all of the 250 scratches, then move up to 600/800 and do the same, up till 1000 grit.
It’s very likely that, during this process, you’re going to raise a really big burr, something visible to the eye, a wire-like hanger-on-er that might just break away at some point. That’s totally fine. It’s also totally fine if it hangs around, it’ll get knocked off the first swipe of the bevel on the stone.
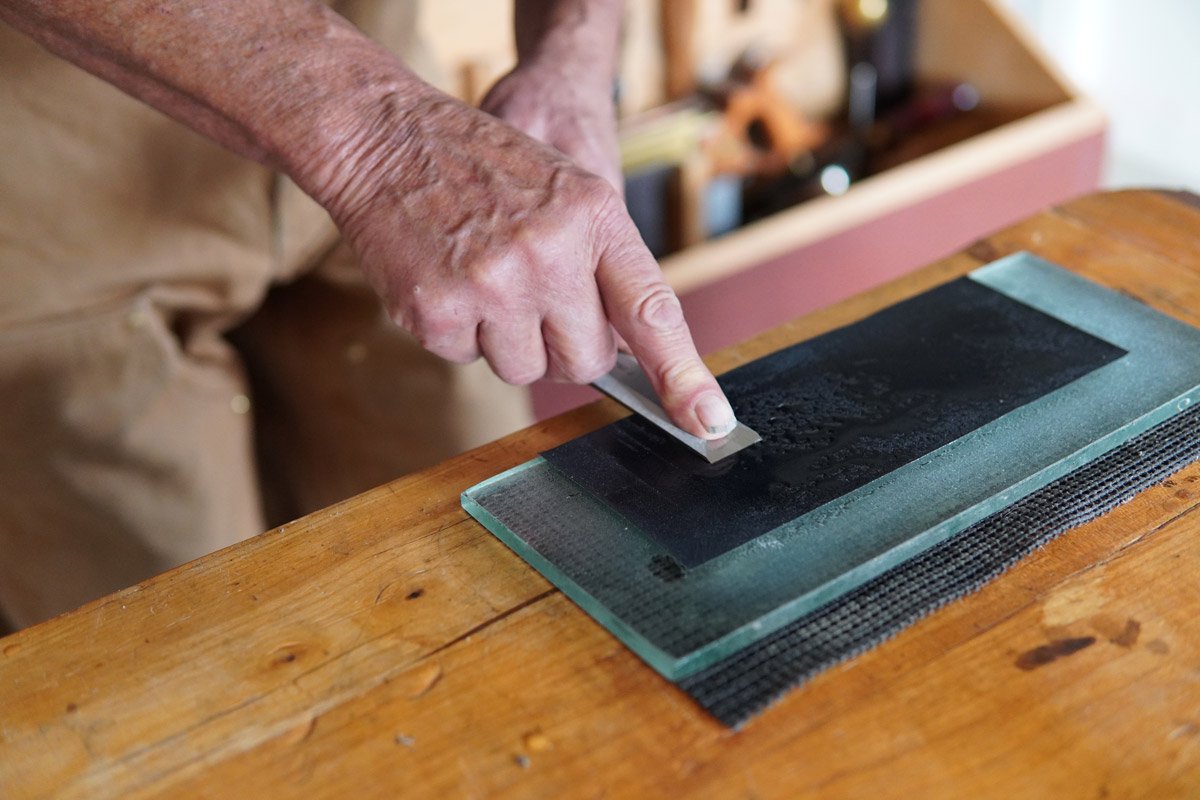
Sharpening/Polishing/Honing the Bevel of the Chisel
Once we know that this back is totally flat, we have raised a burr across the entire leading edge, and we’ve polished away all our last-grit scratches, we can switch to the bevel.

We're going to, once again, use the Sharpie to blackout the entire bevel here. Our hand position is nearly the same as during the flattening process, this time the chisel is just flipped. We start with the back edge of the bevel on the stone, our pointer fingers on either side of the flat back near the tip, and, pivoting on the back edge of the bevel making contact with the stone, we raise the handle up until we feel it “click” into place at the top of the stone (farthest away from us), the entire bevel of the chisel making contact with the stone, the water displaced. We find a comfortable way to lock the handle of the chisel against our wrist, lock our arms, elbows, etc, and we rock our weight back onto our back foot.
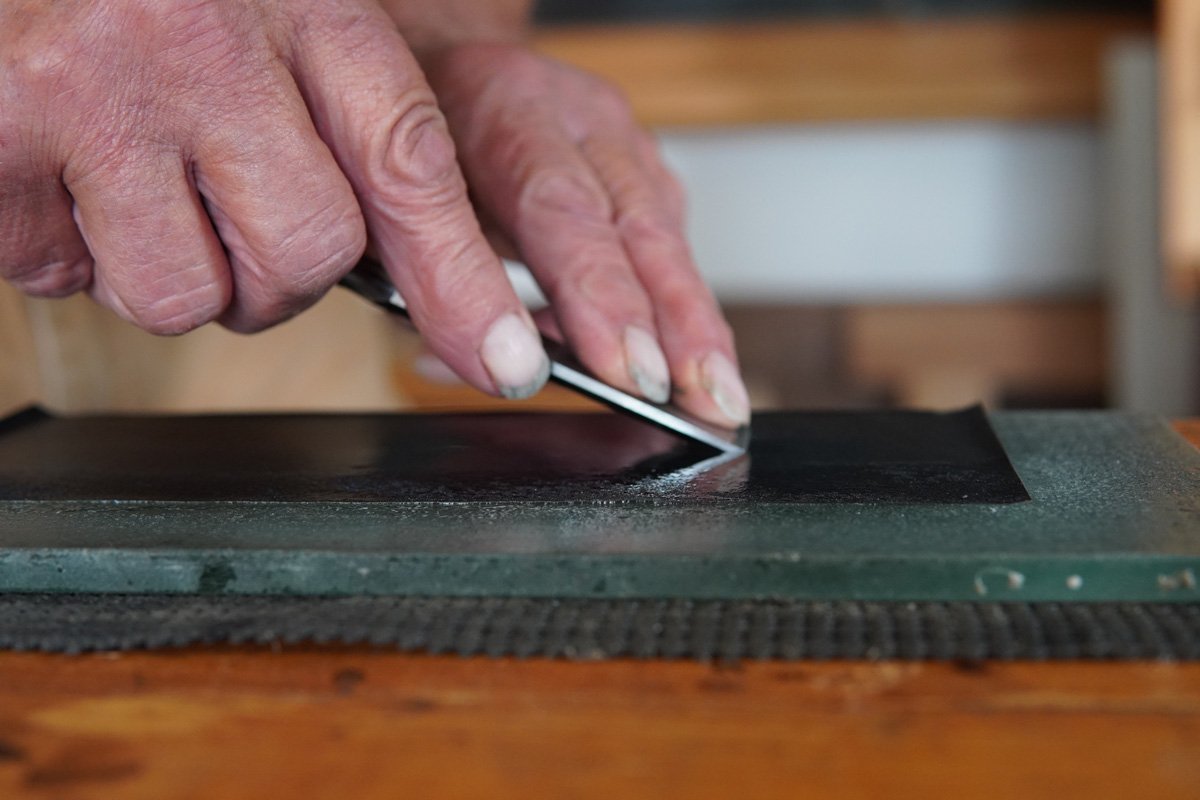
It is a whole lot more controllable to pull than to push, especially with the bevel because there’s so much less in contact with the stone. So when we're sharpening the bevel, we're going to do it only on the pull stroke until we are really, REALLY comfortable with this whole body-locked-center-of-gravity-shifting dance routine.
I pull back, come back to the top of the stone, reset, pull back. The first stroke should have wiped the burr you raised while flattening the back right off. Now, with each subsequent stroke, you should be raising a burr, pressing metal from the bevel side, back to the back of the chisel, so your burr now becomes a diagnostic tool for the bevel. If, as you run your thumb over the burr you feel a heavier “catch” on one side or the other,
Once you have removed the scratch pattern from the factory or polished away the deeper scratches from your last grit used, and you've confirmed that there is a burr raised across the entire back of the chisel, you know you’ve now got a perfectly flat back and a bevel that meets it along it’s entire leading edge. As soon as you remove that burr, you’ve got a sharp blade.
But we probably want to refine that edge a bit more, and that’s why we would now go from our 1000 grit abrasive to a 3000, 8000, or 10,000 grit stone.
Every subsequent grit you use, you need to first polish the back, then move to the bevel. Each step of the sharpening process should be raising a smaller and smaller burr, passing that metal back and forth from the back of the blade to the bevel, so it’s important to rub both the back and the bevel on your abrasive at every stage of the sharpening process.
The refinement process above 1000 grit isn’t necessary, but it will affect how long your edge stays sharp. Here again is another possibility for a law of diminishing returns, because refining the edge takes extra time and extra equipment, and past 1000 grit, the extra wear time of your blade is fairly negligible. I’ve found that going from 1000 grit straight to 8000 grit, stopping there and giving it a quick strop gives me blade edges that last really well with minimal time, equipment and effort.
Stropping
This is the last step, and really more of a failsafe than a necessary step.
We use leather for this step because the softness of the leather will conform to the blade tip a bit and help us correct/address some imperceptible errors we may have made.
We “charge” the strop with an abrasive compound, and then present the back of the blade to the strop the same way we would on the stone while flattening. 3 swipes back, flip to the bevel. 3 swipes back, flip to the back. 1 swipe back, flip to the bevel. 1 swipe back, your blade should now be RAZOR sharp.
I’ve backed my strops with pieces of wood (using adhesive spray) so they behave the way I want them to in use. I want it to act like one final sharpening stone.
Really quick, here’s the argument AGAINST stropping: Excessive stropping will eventually round out the edge because the leather is soft and it conforms to the blade tip. So while a bunch of stropping may help you avoid some sharpening, and may help you appear to be a better sharpener than you actually are, eventually, the stropping process could bite you by creating a rounded bevel that is really hard to re-grind on the stone because it will no longer register as a “flat” on the stone the way it did right out of the box.
At some point, you are, in fact, going to have to re-grind your bevel, and it’s at that point we talk about ideal cutting angles, different steels, and job-specific chisel types, but this primer should have gotten you where you need to go making your $11 chisel work like a $55 boutique chisel out of the box.
For more tutorials on getting your hand tools set up and sharp for best results, check out the video below!
Upgrading Your Chisels
After you’ve used your less expensive chisels for a while and learned how to sharpen them, you might be ready to upgrade to some life-long tools that you can one day pass down to your kids and grandkids.
You’re going to want to look for chisels within the $35-$100 per chisel price range. Some of the things that determine the price of the tools are what the tools are made of. The steel, the wood, etc.
For more information on the types of chisels, check out this post here.
Other Posts You May Enjoy
If you want to learn how to sharpen ANYTHING, check out our live class! Or check out these other posts below: